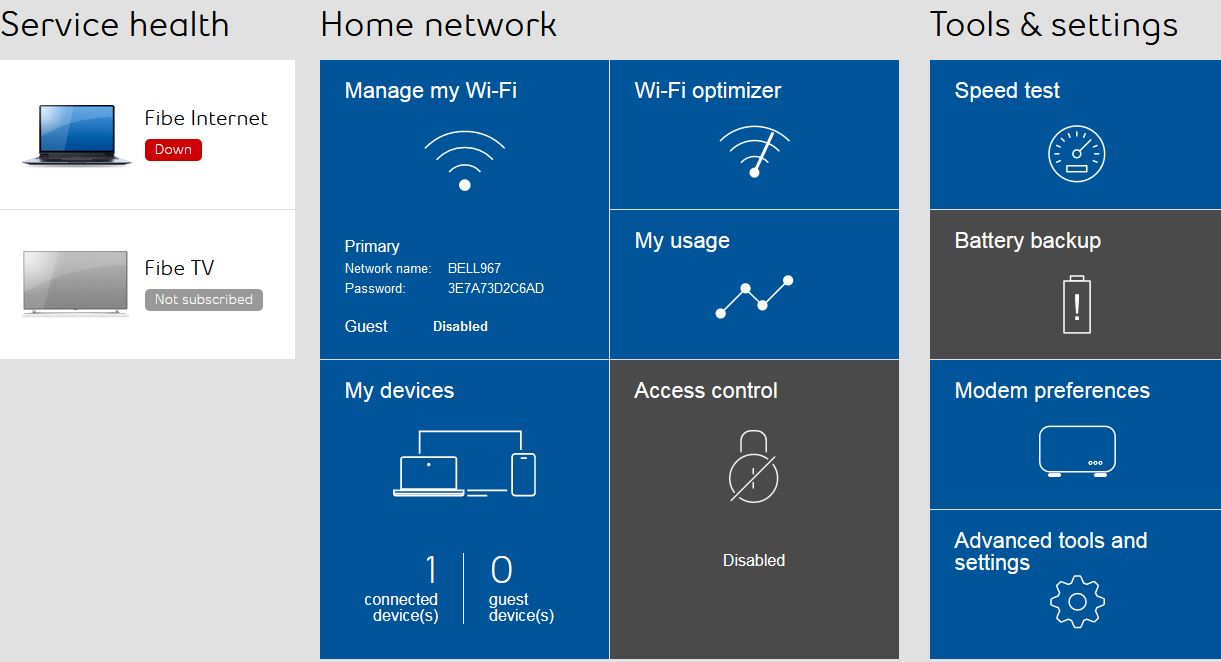
Here are the steps for the Hub 3000 Modem. The access information is via IP http://192.168.2.1
The default password is admin or the serial number (SN) listed on the backside of your modem.
First you will see the screen below. Click on the Internet Link on the top left.

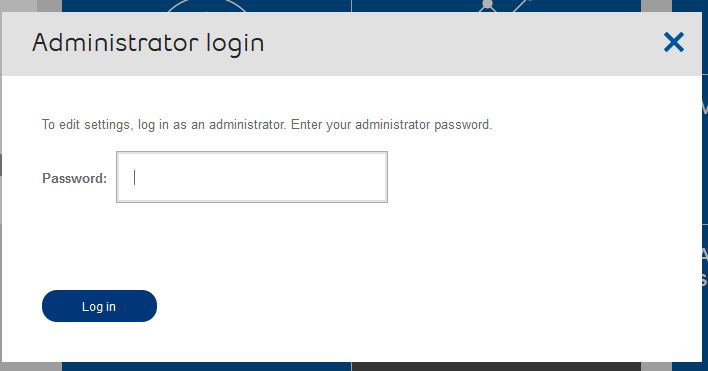
Next you will be prompted to enter the password. Once completed, Click login.
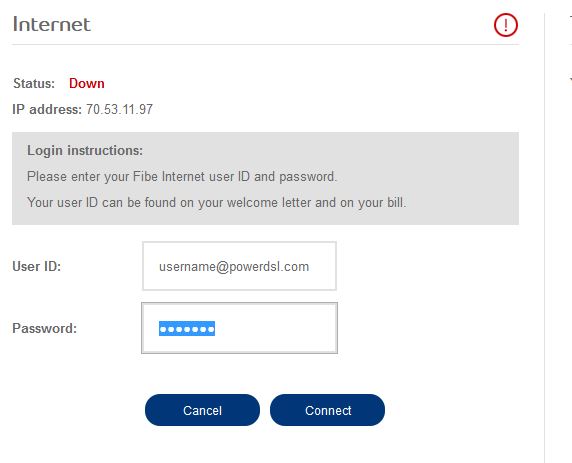
After your successful log in click change and you will be brought to a page to enter your DSL username and password. Scroll down to the bottom section to enter your information.
Type in your DSL username and password and click connect

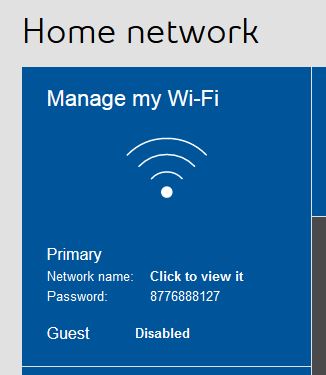
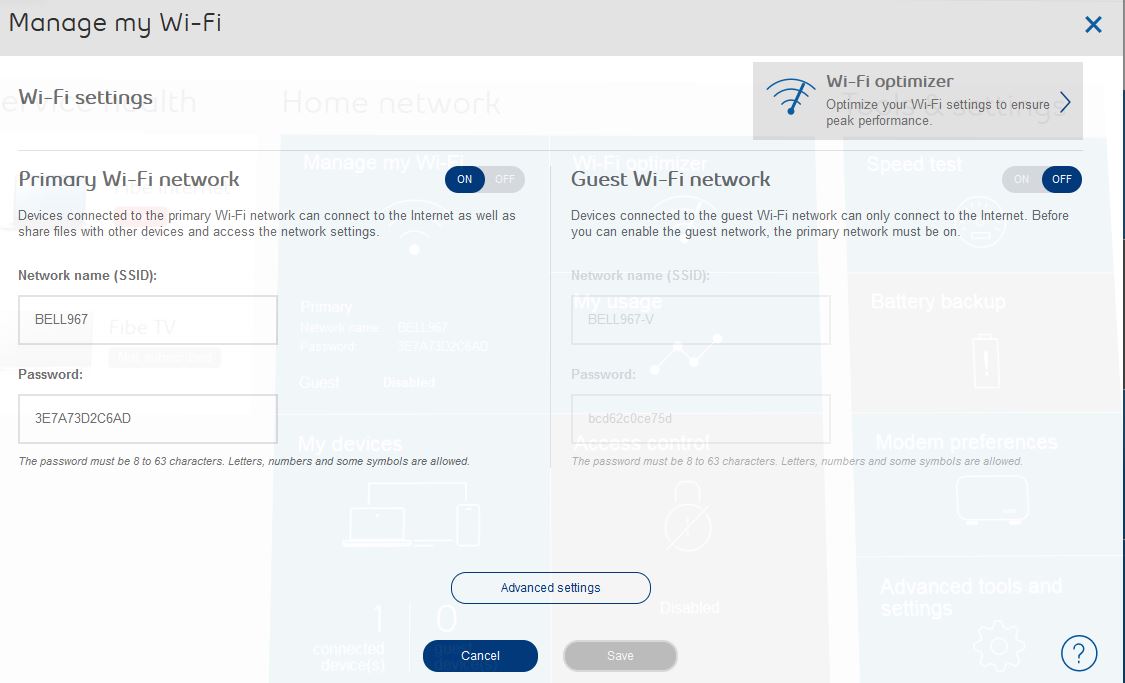
After you click connect it will bring you back to the main screen. Here you will click manage Wifi and you can update your Wifi SSID (name that shows up when looking for your wifi connection) and the preferred password for the wifi. You can choose to use the same wifi name for both your 2.4Ghz and 5Ghz wifi signals. If you want to customize them. You can do that in the advanced menu.
Click Save


On the main wifi link, the default is the manage all the networks with one wifi name (SSID). This is the simpliest way to do it. If you want to separate your signals, click Advanced Settings.
If you want to leave it as one, set your network name and password, and click Save.
If you chose advanced settings, you will see the below link. Set your desired wifi network names and passwords, and click save. Then click the X at the top right to close the window. 2.4Ghz Wifi signals will have a longer reach but may perform a little slower. The 5Ghz Wifi signals will have faster speeds, but signal will not have as long a reach.
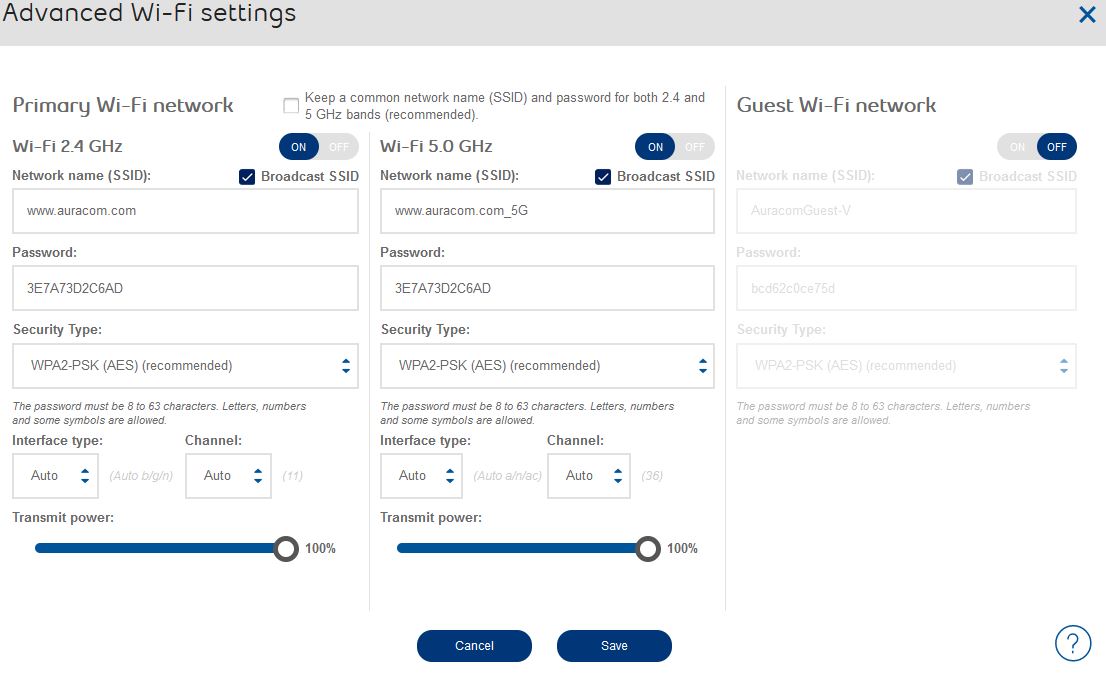
If you click the link beside network name it will show you what you set for the wifi name.
You are now ready to go.
